Colors
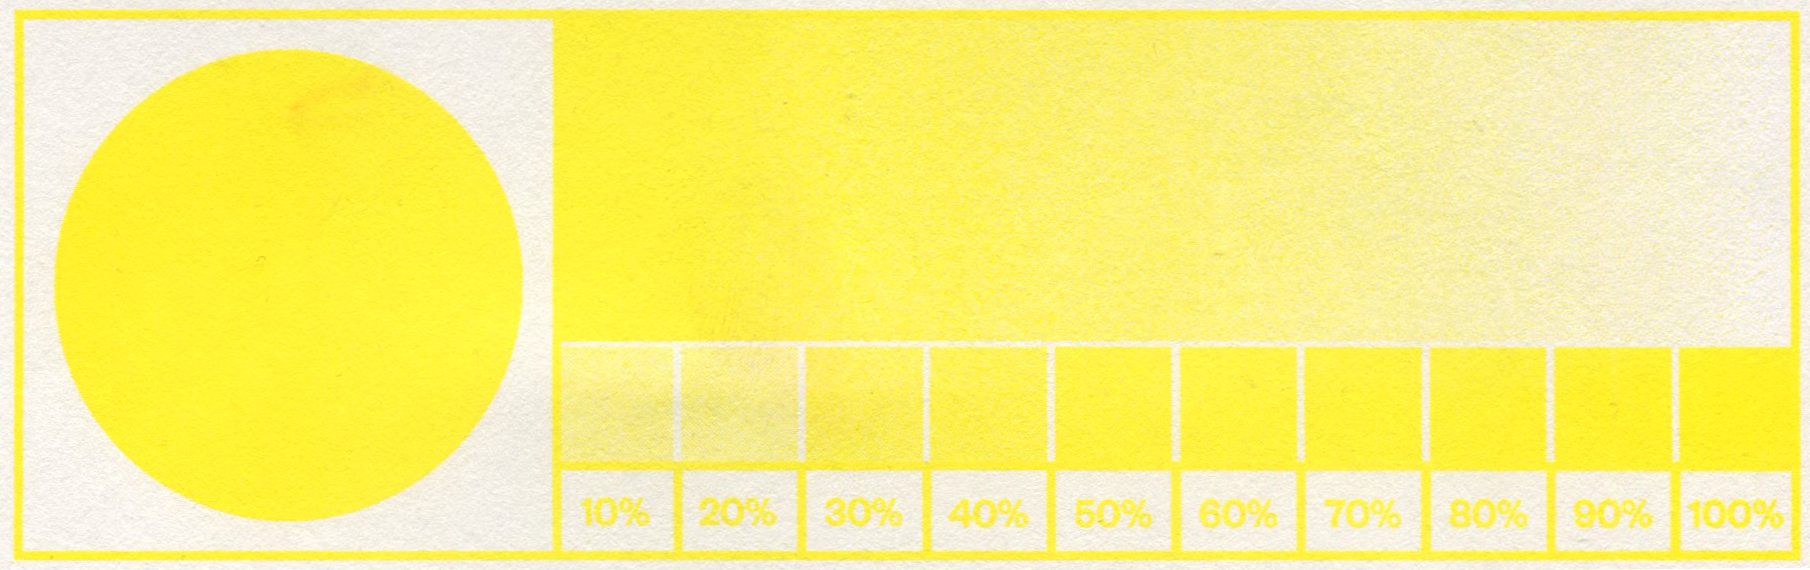
Yellow #FFED00
![]()
Teal #00818A
![]()

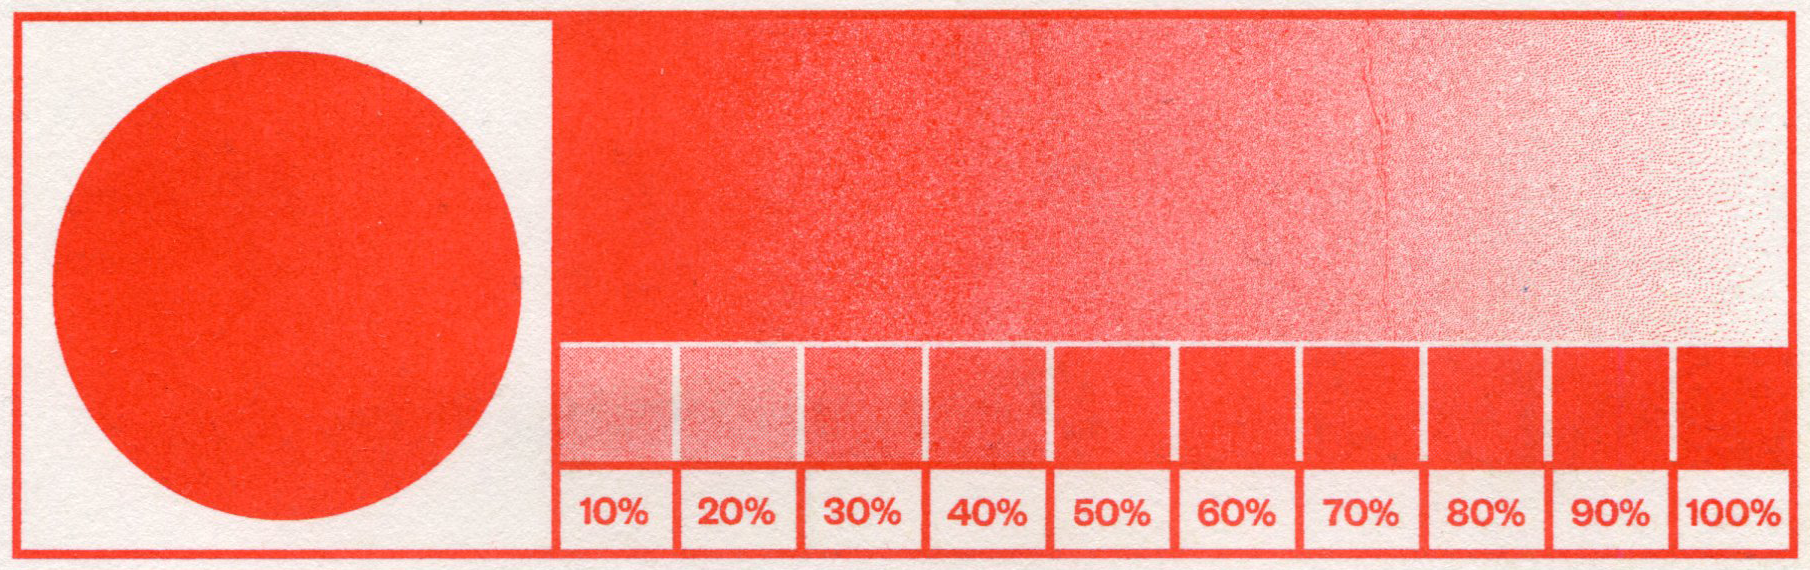
Red #EB5F5A
![]()
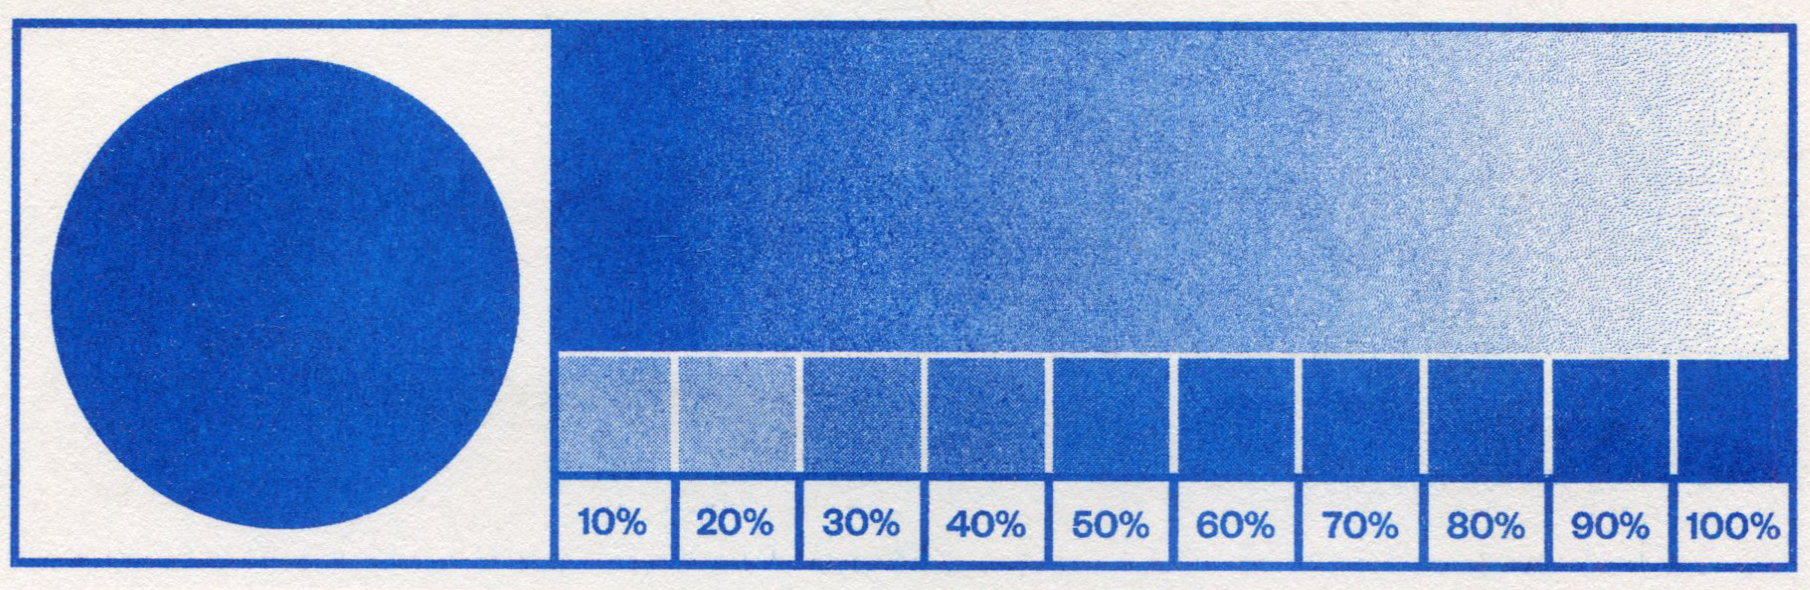
Blue #0974BB
![]()
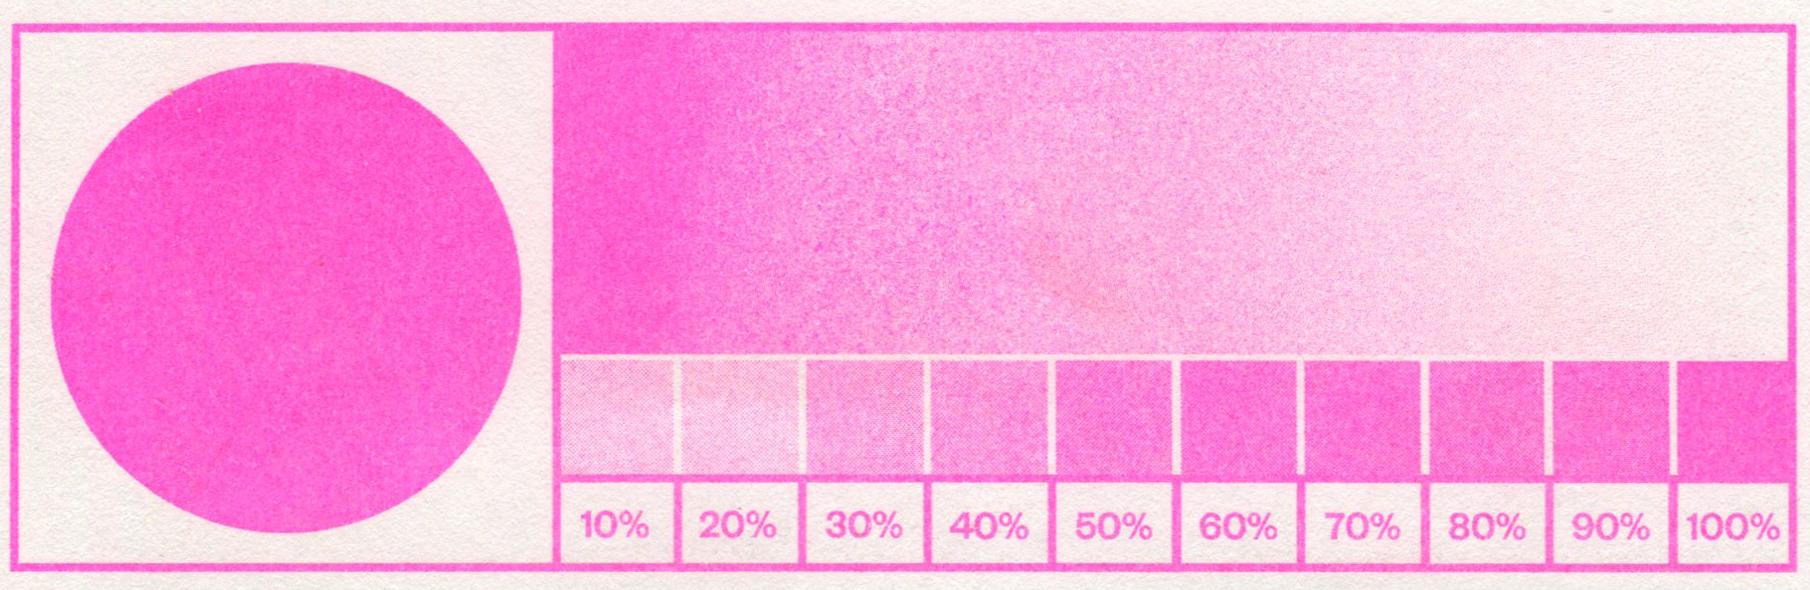
Fluo Pink #E94893
![]()
Metallic Gold #B5996C
![]()

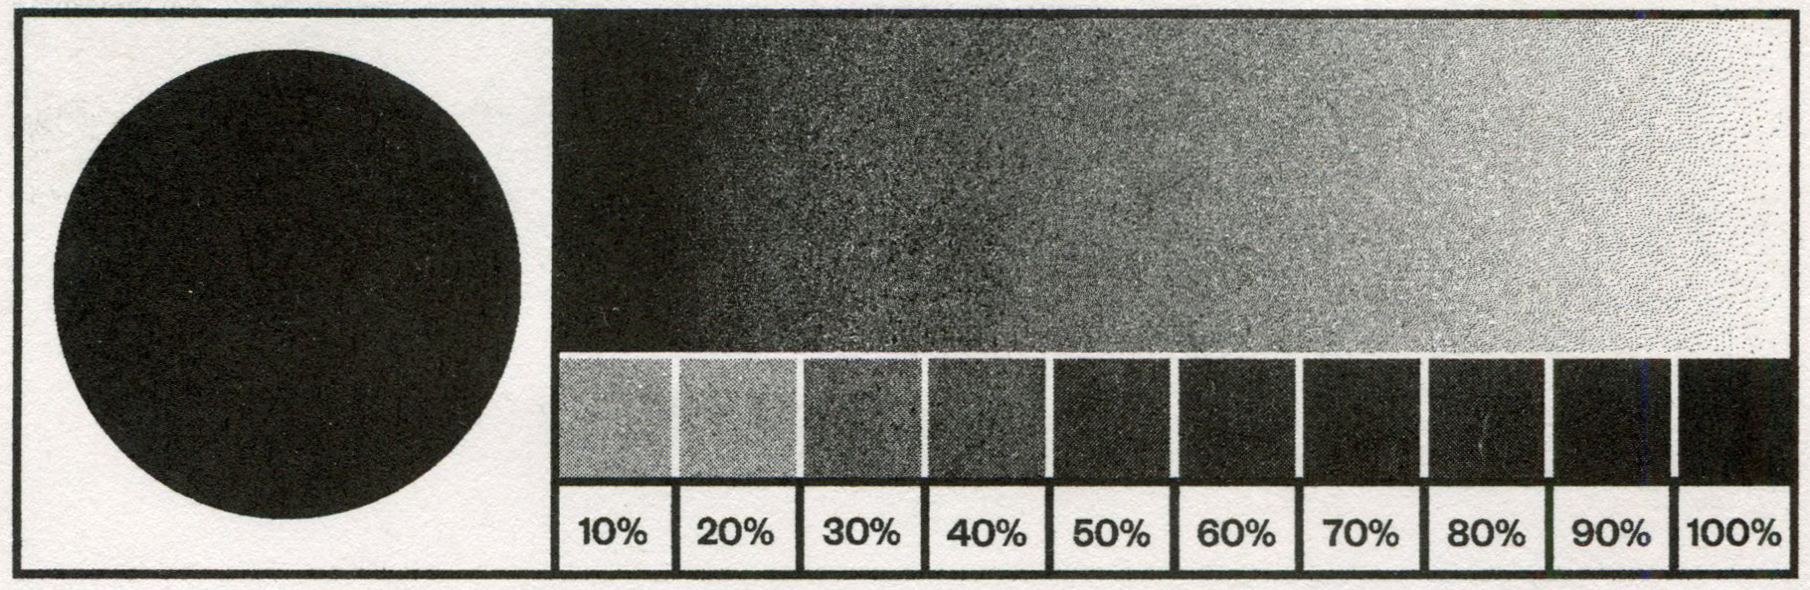
Black #000000
![]()
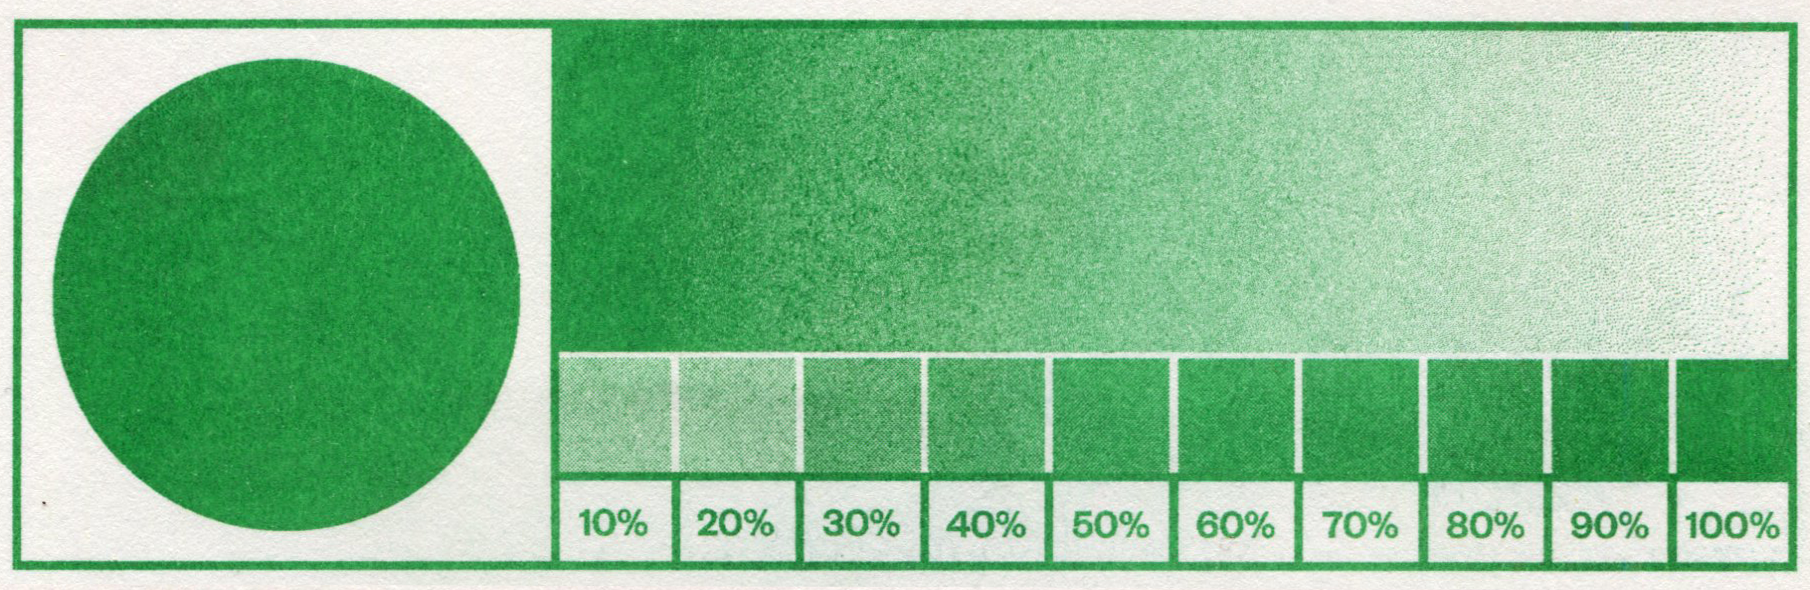
Green #00A04E
![]()
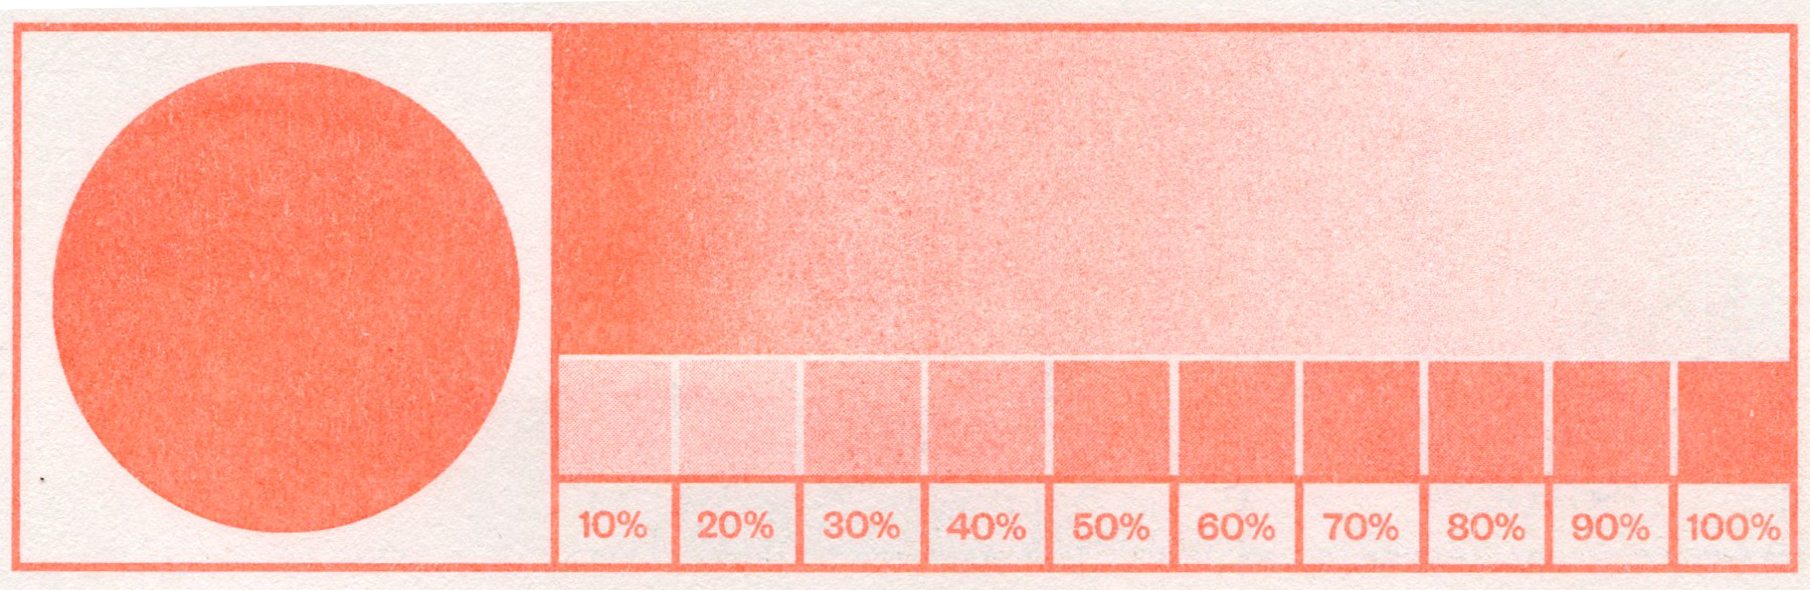
Fluo Orange #ED6E76
![]()
Pricelist
Get in touch to get an estimate for your project, for the calculation, we will need:
- paper size/format
- aprox print run
- numbers of colors you want to use
- info about additional binding
The price of riso printing gets lower with bigger print runs, so the estimate of printing is different for publications than for prints. To get an aprox estimate get in touch with specifications of your project.
Technicalities
Prepare for printing
If it saves you time reading the instructions below, this is what you need to know: preparing documents for riso printing is the same as for screenprinting (serigraphy).
But please, double check by continuing to read further:
The basis for printing is a PDF document, where each color is a separate document or a separate layer. Subsequently, each color must be converted to a grayscale image to provide sufficient contrast when printing. Also, please keep in mind that the color version of your final document must always be submitted for reference.
The size of the PDF document you are sending is always A3 (the image must be layed out on A3), although the final format may not be A3.
If you want to print a multicolor image/graphic it is necessary, if possible (if your final format is not A3) that you add registration marks that help us with printing. At the same time, try to keep in mind the sequence of colors that will be printed (we usually start with lighter colors and continue to darker shades, but sometimes also depends on the image. If you are not certain, ask.
Format
Riso usually uses the A3 format (297×420 mm), but does not allow full bleed print (tisk v živi rob?). When printing, we recommend at least a 1 cm edge on all sides, which means the largest possible format is 277×400 mm.
Papers
Riso machines accept papers 80–220 g/m2 weight. As said before, this printing technique requires use of specific papers that are highly voluminous and thus absorb as much ink as possible.
In our work we mainly use Fedrigoni paper, occasionally also Munken. Contact us please for any specific wishes.
Use of typography
All type charachters (different rules apply for books, please get in touch) must be vectorised (converted to outlines) and prepared as rich black (C100 M100 Y100 K100), thus avoiding rasterization of the typography. At the same time, be aware of not using too small charachters (≥7pt) and too thin of a typeface cut.
Inks
Riso machines use soy inks, therefore the technique is considered quite environment friendly. But also due to the fact that riso does not enable thermal fixation after printing (compared to normal photocopiers which riso machines resemble on the outside), this printing technique requires use of specific papers that are highly voluminous and thus absorb as much ink as possible.
The riso technique also does not enable even ink coverage on larger surfaces. Furthermore, a “crack” can occasionally appear on the print, which indicates that the master paper did not lay out perfectly on the ink drum.
Keep-In-Mind
Riso inks are never fully dry, so we recommend that you avoid using large areas of color on the covers, which would cause people touching them when flicking through your zine/book, so transfering some ink on their fingers and maybe smudging inner pages.
For double-sided printing, we recommend that you use less saturated colors and therefore avoid possible “piercing” of the ink to the other side.
Also, with multicolor printing, traces of the paper feed roller, by which paper travels, may appear. We try to avoid this by taking more time for printing, meaning we leave prints to dry longer before printing another layer of color.
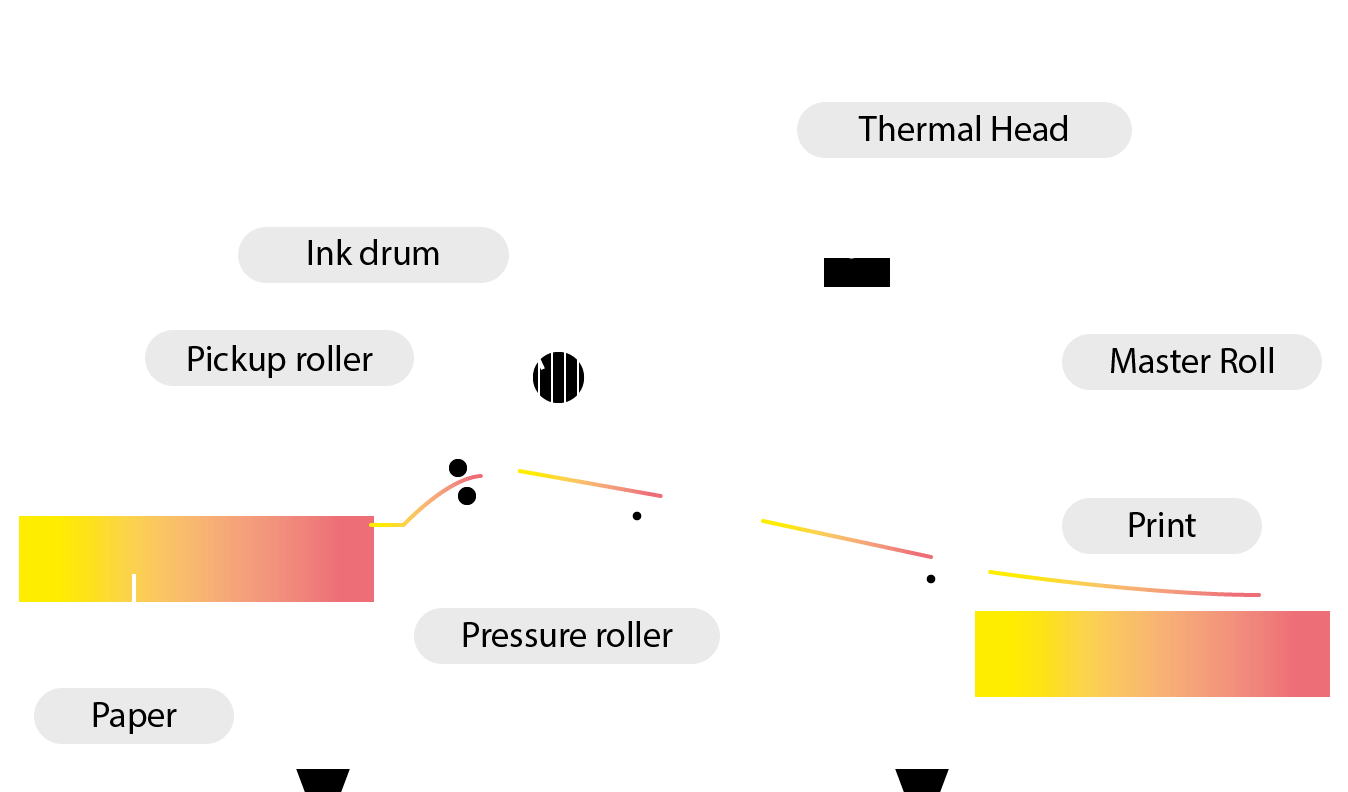
How does it work ?
Risography is a stencil based printing technique, of which screenprinting is the most known.
Thermal head creates the image of your print on a master paper. Master paper is a thin (similar to baking) paper, that »wraps« around an ink drum. The ink drum rotates during printing, causing the ink to transfer through master paper onto sheets of paper. Data/image is sent to the machine via a scanner table that is placed on the top of the riso machine or via computer.
Thermal head creates the image of your print on a master paper. Master paper is a thin (similar to baking) paper, that »wraps« around an ink drum. The ink drum rotates during printing, causing the ink to transfer through master paper onto sheets of paper. Data/image is sent to the machine via a scanner table that is placed on the top of the riso machine or via computer.
Printing starts with the pickup roller taking a sheet of paper from paper feeder, the drum(s) print the image on it and finally, a special needle removes the paper from drums and ejects it.
We currectly use MZ770 machine which allows us to print two-color graphics simultaneously.
The ink drum is the variable part of the machine. Each color has its own drum, so the number and colors of drums present the color palette and possible color combinations. You can overlap different colors and create new shades, this works best when overlaping colors are not too dark.